
Your iron or steel fence faces one constant threat—rust. Moisture, oxygen, and time work together to corrode unprotected metal, weakening its structure and dulling its finish. By choosing the right rust prevention and paint system, you create a barrier that keeps your fence strong, durable, and visually appealing for years. Understanding how each layer of coating functions and why surface preparation matters sets the foundation for long-term protection.
You’ll see how coating systems work in layers, each designed to fight corrosion in a specific way. These systems balance aesthetics, durability, and maintenance, offering options that fit both budget and performance needs. Learning how paint adhesion, primer chemistry, and surface cleanliness interact helps you make informed decisions that reduce rework and extend maintenance cycles.
As you explore how rust forms, what makes certain coatings last longer, and how Fence Specialties LLC supports contractors and homeowners through reliable supply and coating compatibility, you’ll gain practical insight into protecting your metal fence investment. This knowledge empowers you to choose materials and finishes that meet your environment and performance goals with confidence.
Corrosion Mechanisms in Iron and Steel Fencing
Iron and steel fences degrade when electrochemical reactions occur on exposed metal surfaces, often triggered by moisture, salts, and pollutants. The most serious damage happens when protective coatings break down, allowing rust to form and spread beneath the paint or other finishes.
Electrochemical Oxidation and Environmental Triggers
Rust forms through electrochemical oxidation, a process that starts when iron reacts with oxygen and water. In this reaction, small areas on the metal act as anodes and cathodes, creating a flow of electrons. Iron atoms at the anode lose electrons and form iron ions, which later combine with oxygen to produce iron oxide, or rust.
The presence of electrolytes such as saltwater or rain accelerates this process. Coastal air containing chloride ions or urban pollution containing sulfur and nitrogen oxides can greatly increase corrosion rates. Even thin layers of moisture—like condensation—provide enough conductivity for these reactions to start.
Climate conditions matter. In dry, rural zones, corrosion happens slowly. In contrast, high humidity or airborne chemicals in industrial or coastal environments make oxidation continuous. Regular inspection and controlled exposure are key parts of any corrosion protection plan.
Coating Failure Points and Substrate Exposure
Protective coatings such as paint, galvanizing, or powder layers act as a barrier between the metal and the environment. Once these coatings are scratched, chipped, or improperly applied, the steel beneath immediately becomes active in the corrosion cycle.
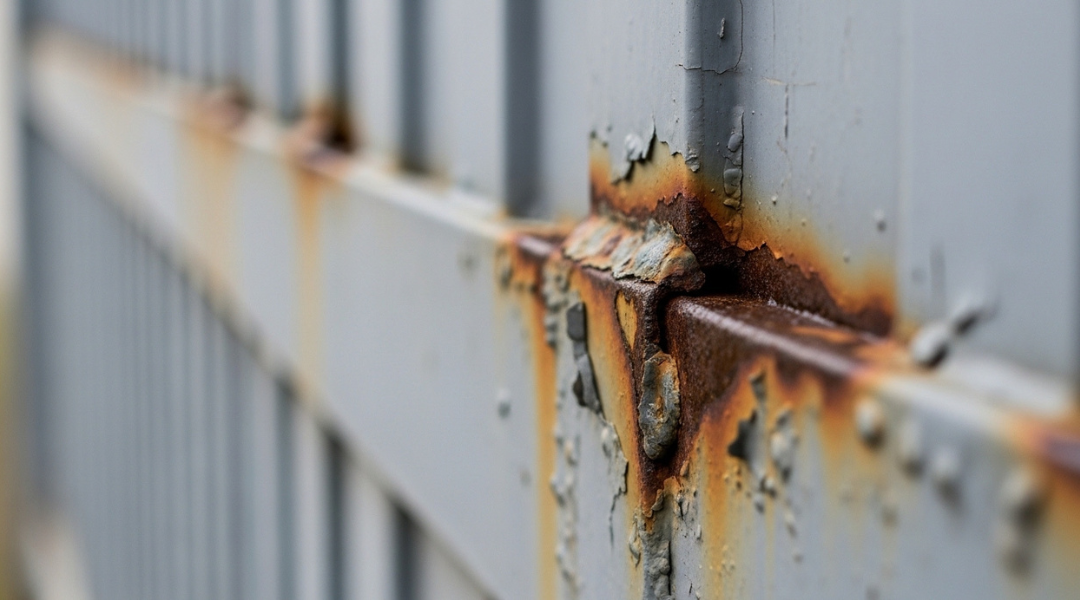
Tiny coating defects, especially along edges or weld seams, allow water to penetrate. The trapped moisture then sets up small corrosion cells. Rust can creep sideways under the coating, causing undermining that leads to flaking and discoloration.
When you use systems with cathodic protection, like hot-dip galvanizing, zinc sacrifices itself by corroding before the steel. This “sacrificial anode” effect stops rust from forming even if the coating is breached. Without this protective mechanism, bare steel quickly weakens, requiring frequent surface maintenance and recoating.
Paint System Layers and Protective Functions
Each paint layer on an iron or steel fence performs a specific duty that ensures long-term rust prevention. Effective protection depends on how well each coat adheres, the barrier it provides, and how the total film thickness resists moisture, oxygen, and sunlight.
Primers, Intermediates, and Topcoat Roles
A primer bonds directly to the cleaned metal surface and forms the foundation for all other coatings. You often use a zinc-rich primer or epoxy primer because they provide strong adhesion and corrosion resistance. Zinc-rich primers offer sacrificial protection, meaning the zinc corrodes before the steel does. Epoxy primers create a tight, chemical-resistant seal that blocks moisture and oxygen.
An intermediate coat, or build coat, adds film thickness and strength. Its purpose is to reinforce the barrier and smooth out the surface before the final coat. Epoxy coatings are common here because they resist chemicals and abrasion while maintaining compatibility with the primer and topcoat.
The topcoat provides color, gloss, and UV protection. A polyurethane topcoat is often chosen for its gloss retention, weather resistance, and durability. It shields the underlying layers from sunlight and rain while maintaining a clean finish.
| Layer | Typical Material | Main Function | Key Benefit |
|---|---|---|---|
| Primer | Zinc-rich or Epoxy | Corrosion inhibition and bonding | Strong adhesion |
| Intermediate | Epoxy or MIO epoxy | Thickness buildup and strength | Barrier against moisture |
| Topcoat | Polyurethane | UV, color, and chemical resistance | Durable, glossy finish |
Adhesion, Barrier Protection, and Film Thickness
Good paint adhesion keeps protective coatings from peeling and allows each layer to work as a continuous barrier. You improve adhesion by cleaning and roughening the metal surface before applying the primer. Even small spots of rust or oil can weaken the bond and shorten coating life.
Barrier protection depends on film density and composition. Epoxy and polyurethane coatings form dense layers that block oxygen and water. The thicker the dry film thickness (DFT), the longer the protection usually lasts. Still, applying too much paint can trap solvent and cause cracking.
Each coat has a recommended DFT, and manufacturers often require a drying time between coats to ensure proper curing and adhesion. Following these intervals helps the primer and topcoat chemically link, creating a tough, uniform shield against rust and weather.
Surface Preparation Standards Before Coating Application
Proper surface preparation ensures that protective coatings bond firmly to metal and perform under weathering, abrasion, and moisture exposure. You must remove rust, create a clean anchor surface, and confirm that no contamination remains before applying a primer, rust converter, or finish coat.
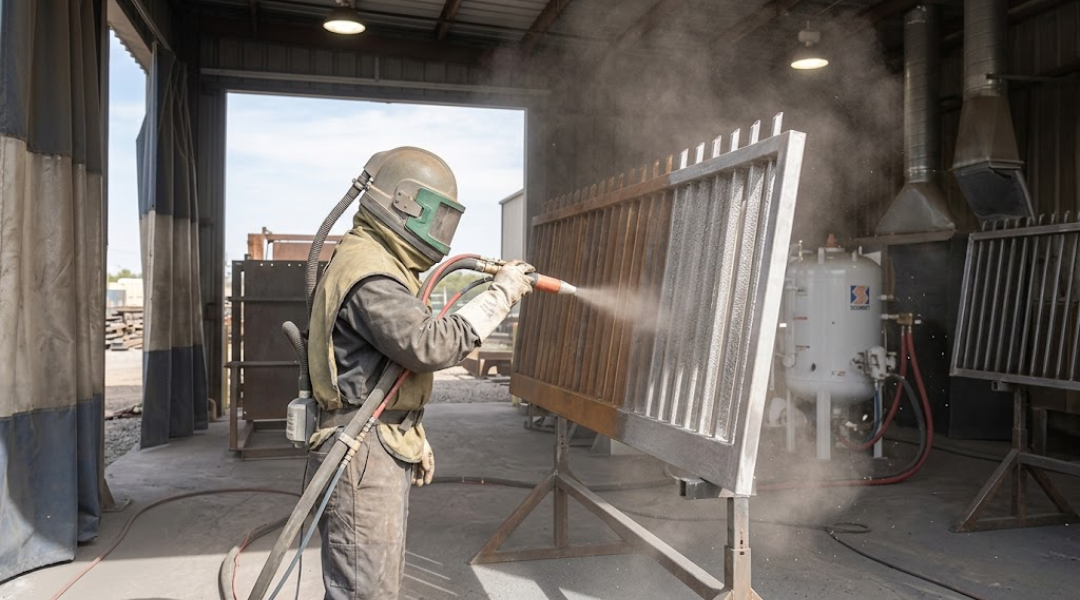
Rust Removal Grades and Cleanliness Benchmarks
Before painting or using products like Corroseal or POR‑15, remove all loose corrosion and old coating layers. Industry benchmarks such as AMPP (formerly SSPC/NACE) and ISO 8501‑1 define how clean iron or steel must be. These range from SP 1 Solvent Cleaning to SP 10 Near‑White Metal Blast, each specifying the allowed amount of rust or mill scale.
| Grade | Description | Typical Use |
|---|---|---|
| SP 2 | Hand tool cleaning — wire brushing or scraping removes loose rust. | Small areas, light oxidation |
| SP 3 | Power tool cleaning — grinders and sanders remove contamination faster. | Moderate corrosion, fence posts |
| SP 6 | Commercial blast cleaning — about 2/3 of surface free from rust or scale. | Exterior steel, gates |
| SP 10 | Near‑white blast — almost total removal of all rust and coatings. | Marine or coastal exposures |
Contaminants such as oil, grease, or salts must be removed with a degreaser or solvent before mechanical cleaning. Any residue can cause paint failure during exposure tests like the ASTM B117 salt spray test. Achieving a uniform, clean surface lets rust converters react properly, forming stable iron phosphate compounds that stop further corrosion.
Profile Creation for Coating Adhesion Performance
Clean metal alone isn’t enough; coatings also need a surface profile that promotes adhesion. This texture consists of microscopic peaks and valleys created by blasting, sanding, or other abrasion methods. Without it, even advanced coatings may peel or delaminate.
Aim for a surface roughness suited to your coating system. Epoxies and urethane primers typically require a sharper profile than rust converters. Abrasive media like steel grit or garnet create angular cuts that help liquid coatings lock into the metal. Power wire brushing smooths surfaces, so it should follow rather than replace profiling steps.
For smaller fence components, sandpaper or flap discs provide adequate texture without deformation. When you finish cleaning and profiling, inspect by sight and touch—paint should wet the metal uniformly with no glossy patches. This confirms proper mechanical bonding and maximizes coating performance against rust, weather, and impact.
Tradeoffs Between Coating Systems and Maintenance Cycles
Different coating systems for iron and steel fences vary in durability, application effort, and upkeep needs. Your choice affects how often maintenance is required and the total cost of ownership over the fence’s service life.
Single-Coat vs Multi-Layer System Durability
A single-coat system uses one protective layer, often a high-build epoxy, zinc-rich primer, or powder coat. It provides solid corrosion resistance for moderate environments, but it tends to degrade faster in areas with heavy moisture or salt exposure.
A multi-layer system combines a primer, intermediate coat, and topcoat. This structure improves barrier protection and slows corrosion spread if damage occurs. Typically, each layer serves a function—primer for adhesion, mid-coat for build, and topcoat for UV and weather resistance.
| Coating Type | Layers | Typical Use | Expected Service Life* |
|---|---|---|---|
| Single-coat powder | 1 | Light industrial or residential | 5–10 years |
| Multi-layer (zinc primer + epoxy + polyurethane) | 3 | Coastal or highly corrosive zones | 15–25 years |
*Service life varies by exposure, surface prep quality, and environment per ISO 12944 classifications.
If you need a long interval between repaints, multi-layer systems offer more consistent performance. However, for short-term or cost-limited jobs, single-coat systems can still be effective when applied correctly and maintained on schedule.
Cost, Labor Intensity, and Long-Term Performance Balance
Coating strategies differ not only in protection but also in cost structure. Hot-dip galvanizing usually has a higher initial cost but nearly eliminates corrosion maintenance for decades. Field-applied paints, while cheaper upfront, require regular inspection and touch-ups.
You should also factor in labor intensity. Multi-layer applications demand careful surface preparation, curing time, and skilled labor. That raises installation cost and project time. Single-step powder coating applied in a controlled environment lowers labor cost but may need rework sooner outdoors.
Maintenance cycles influence life-cycle cost more than initial expenses. Spending more now for a durable system can reduce total repainting and labor costs later. Combining galvanizing as a base layer with powder or liquid topcoats offers a balanced approach—strong corrosion defense and reduced long-term upkeep.
Inventory and Coating Compatibility in Fence Supply Distribution
The consistency of steel quality and surface finish directly impacts how well coatings adhere and perform. Your ability to match available fence materials with suitable protective systems determines both durability and cost efficiency.
Variations in Steel Finishes Across Supplier Inventories
Steel fencing materials differ based on how suppliers process and finish the metal. Common finish types include hot-dip galvanized, electro-galvanized, cold-rolled, and mill-finished steel. Each has unique surface textures, zinc coating thicknesses, and levels of oxidation resistance.
A hot-dip galvanized surface is thicker and rougher, ideal for powder coatings that require strong mechanical bonding. In contrast, electro-galvanized steel provides a smoother surface suitable for uniform e-coat or liquid paint application but may need a primer to prevent underfilm corrosion.
Below is a reference table showing finish compatibility with common coatings:
| Steel Finish | Typical Coatings Used | Notes on Performance |
|---|---|---|
| Hot-Dip Galvanized | Powder coat, epoxy paint | Longest corrosion life |
| Electro-Galvanized | E-coat, polyester, acrylics | Even surface, lower protection |
| Cold-Rolled Steel | Primer + topcoat paint | Must be pretreated or phosphated |
| Mill Finish | Requires full prep before coating | High corrosion risk if uncoated |
Your suppliers may carry mixed inventories from different mills, so confirm surface specifications before finalizing coating systems to ensure predictable performance.
How Material Sourcing Affects Coating Selection and Outcomes
Where your steel originates often determines its chemistry and residual oils, which influence coating adhesion. Imported batches sometimes contain higher carbon or silicon levels that react differently during galvanizing or phosphate pre-treatment, affecting coating thickness and appearance.
If your distributor sources steel from multiple producers, inspect surface cleanliness and oxide film quality. Variations in mill scale or oil film thickness can cause poor bonding or early chipping when coated. Establishing consistent pre-treatment protocols—like degreasing or abrasive cleaning—helps stabilize coating results across diverse inventory.
Choose coatings based on your supply patterns. For instance, powder coating works best when steel consistency is high, while e-coat or Dacromet systems tolerate slight composition differences better. Coordinating with your supplier for traceable material data ensures each batch meets the coating’s adhesion and curing requirements.